Let’s be honest, getting your brows to look just right every single day can feel like a full-time job. One brow’s arched, the other’s doing its own thing, and somehow your pencil always runs out when you’re already running late!
That’s exactly why more and more men and women are turning to semi-permanent and permanent makeup, especially in the brow department. In recent years, treatments like ombre brows have skyrocketed in popularity, and for good reason! They offer defined, low-maintenance brows without the daily struggle.
At Noosa Brow Co, we know the idea of “tattooing” your face might sound a little intimidating. There are plenty of myths and horror stories about botched brows or bold results that never fade. But brow technology has come a long way. Ombre brows are far more refined than the old-school permanent makeup techniques, and when done by a trained professional, they can look incredibly soft, natural, and flattering.
But the key is knowing what to expect before your appointment, what the healing process looks like, and how to care for your brows after. That’s why, in this post, we’ll walk you through everything you need to know about ombre brows, from the benefits and process to the healing stages and real results.
What Are Ombre Brows and How Do They Work?
The art of semi-permanent makeup has grown remarkably over the last several years, and ombre brows are no different!
So, what exactly are they?
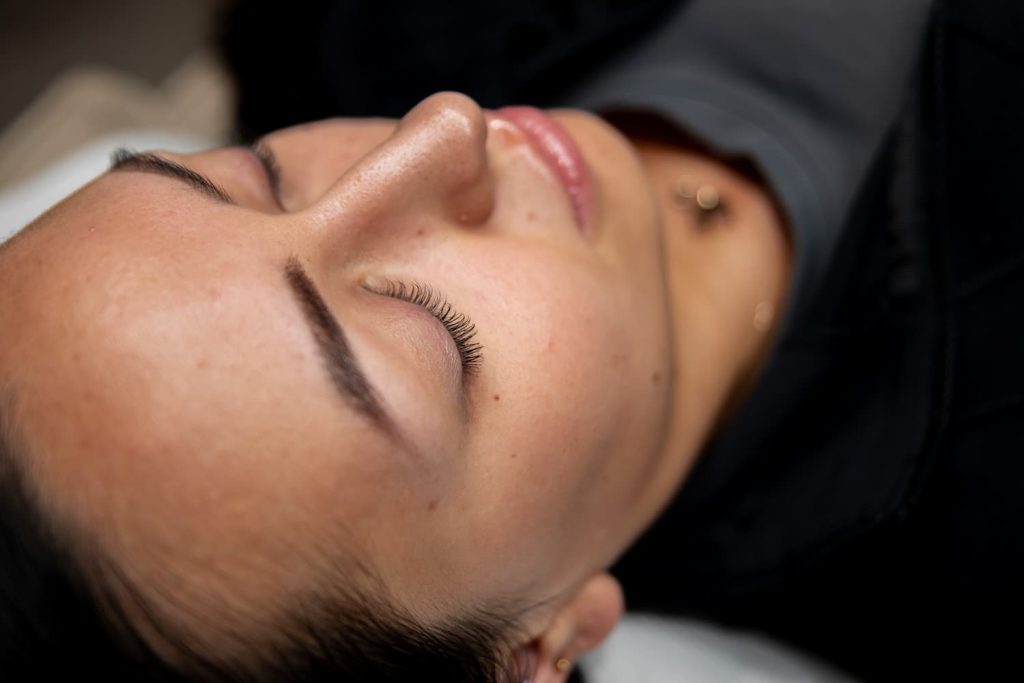
Ombre brows are a semi-permanent eyebrow technique that uses a digital machine or handheld tool to deposit tiny, pixel-like dots of pigment into the skin. This creates a soft, shaded effect that beautifully mimics the look of brow powder or pencil. The name “ombre” comes from the gradient of colour that starts lighter at the front of the brow and gradually deepens toward the tail.
This mimics how natural brows tend to grow, with softer definition near the inner corners and fuller, denser hair toward the arch and tail.
There are a few different styles to choose from, depending on the look you’re after:
- Traditional Ombre Powder Brows: These give you that soft powdered look with crisp edges – lighter at the front with a filled-in arch and tail. Perfect if you want that more defined, dramatic appearance!
- Borderless Ombre Powder Brows: Looking for something exceptionally soft without defined edges? This style is ideal if you want a very natural appearance or have more mature skin
- Ombre Combo Brows: The best of both worlds! This combines microblading in the front and tail for those fine hair strokes with ombre shading techniques. You’ll get a natural yet perfectly manicured look
Ombre Brows vs. Microblading
The biggest difference between ombre brows and microblading lies in the application technique and the final look.
Microblading is a technique that is used to mimic natural hair strokes and uses fine needles to “etch” delicate, hair-like lines into the skin. Ombre brows, on the other hand, use a soft shading or stippling technique to create a powdered, gradient effect.
There are differences in how long they last as well. Microblading typically stays put for around 12 to 18 months, where Ombre brows can last up to 2–3 years. Healing-wise, Microbladed brows tend to scab in smaller, flakier patches. Ombre brows often scab in slightly larger sections, but many find the overall process gentler and more predictable.
Who Should Consider Ombre Brows?
Ombre brows are versatile, inclusive, and suit nearly every skin type, especially those who may not be ideal candidates for microblading. With over 18 years of evolution behind this technique, it’s now one of the most reliable, customizable options in semi-permanent makeup.
- Have oily or combination skin, where hair strokes might fade or blur faster
- Struggle with sparse, patchy, or over-plucked brows
- Want to camouflage scars or asymmetry
- Have mature skin, where ombre shading tends to heal better and last longer
- Fill in your brows daily and want a polished, low-maintenance routine

5 Reasons Ombre Brows Are Totally Worth It
If you’ve ever dreamed of waking up with flawless, softly defined brows and skipping the daily brow pencil routine, ombre brows might just be the solution you’ve been looking for. From a natural, filled-in look to serious, long-lasting glam, there are so many reasons why this semi-permanent technique has become a go-to for brow lovers everywhere.
1. Natural, Yet Defined
Ombre brows offer the perfect balance of structure and softness. The gradient shading technique transitions from lighter at the front to deeper toward the tail, mimicking the way brows naturally grow. This gives a polished, dimensional look that enhances your features without looking harsh or overdone. If you want to fill it in more, it offers the perfect base and shape to build from.
Even better? Ombre brows can actually balance your facial features by softening prominent characteristics like sharp jawlines or strong brow bones. The gentle transitions create a more harmonious overall appearance – your face just looks more balanced!
2. Results That Actually Last
This is one beauty investment that pays off. Ombre brows typically last 1 to 3 years, depending on your skin type and aftercare. Because the pigment is deposited more evenly through shading, ombre brows fade more gradually and maintain more of their shape over time. That means fewer touch-ups, longer-lasting definition, and brows that stay gorgeous, no matter the weather or activity.
3. Low Maintenance, High Reward
Once healed, your brows are ready – no shaping, no filling, no fuss. They’re water- and sweat-resistant, so you can confidently take on humidity, workouts, and even ocean dips without worrying about your brows smudging or fading. A quick touch-up now and then is all you need to keep them looking fresh.
4. Works on All Skin Types
One of the biggest benefits of ombre brows is that they are super versatile and suitable for almost every skin type. For those with oily skin, where microblading often fades quickly, ombre brows provide superior longevity and resist blurring.
The powdered effect looks especially flattering on mature skin, offering a softer, more natural appearance. And if you have sensitive skin? Ombre brow techniques are more gentle than traditional brow tattoos and don’t irritate the skin.
Completely Customisable
Your brows should be as unique as you are! The beauty of ombre brows is that you can completely personalise them based on your preferences and facial structure. Your brow artist will tailor:
- Intensity: The level of pigment can be adjusted to match your vibe.
- Style and Shape: Your brows will be mapped and shaped to flatter your face structure, lifting and framing your eyes in the most flattering way possible.
- Shade: Your pigment colour will be carefully chosen to match your skin tone and hair colour for the most natural effect.
What to Expect At Your Appointment
Knowing what to expect during your ombre brows procedure not only helps take the mystery out of the process, it also helps you feel more confident, comfortable, and empowered when booking your appointment!
Consultation and Brow Mapping
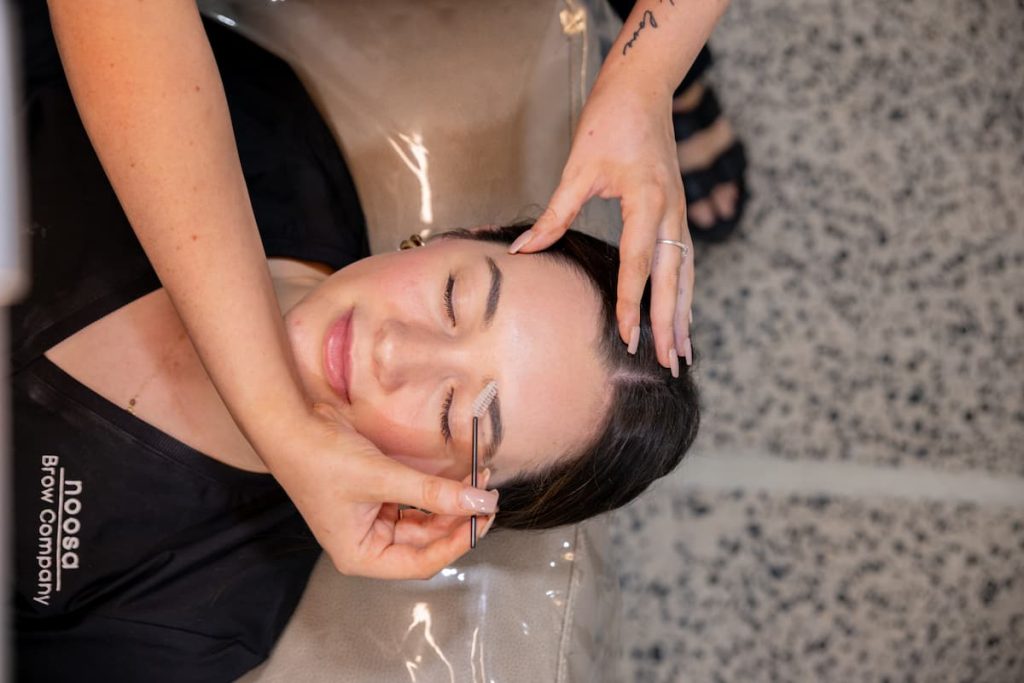
The ombre brow process begins with a thorough consultation to make sure you and your artist are both on the same page. During this conversation, your technician will ask about your ideal brow look and assess your natural features.
They may even ask you to come in with your brows done the way you usually wear them, so they can better understand your personal style. This helps them create the best shape for you.
Here, your technician will use precise rulers, measuring tools and your facial features to map out the ideal shape for your brows. This is an important step to ensure your brows stay symmetrical and balanced.
Choosing the Right Pigment
Pigment selection is key to achieving the most natural-looking ombre brows. Your technician will consider several factors when choosing the perfect colour for you:
- Your skin’s overtone (light, medium, or dark)
- Your skin’s undertone (warm, cool, or neutral)
- Your natural hair colour
- Your personal style preferences
Step-by-Step Application Process
Once you’ve approved the shape and colour, it’s time to get started!
- Cleaning and Numbing: First, your technician will clean the brow area and apply a topical numbing cream to minimise any discomfort. The numbing agent needs about 10-15 minutes to take effect, making the process much more comfortable.
- Brow Shaping: After you’re fully numb, the technician will outline your brows using the shape you’ve both agreed upon. This ensures everything is set and symmetrical before the pigment is applied.
- Pigment Application: The technician will then begin applying pigment using either a handheld tool or a digital machine. The special stippling or dotting technique is used to create the signature ombre effect that mimics the look of natural brow makeup.
How Long Will It Take?
A full ombre brow session typically takes between 2.5 to 3 hours. Here’s the breakdown:
- Consultation and Discussion: 30 minutes
- Brow Mapping and Shape Design: 30-60 minutes
- Numbing Process: 10-15 minutes
- Pigment Application: 1-2 hours
After the procedure, your brows will appear darker than expected. Don’t worry—this is completely normal! The colour will gradually soften and settle over the next few weeks, revealing the soft, beautiful ombre effect you’ve been waiting for.
Ombre Brows Healing Stages and Aftercare
Healing is just as important as the treatment itself! Proper aftercare is key to ensuring your ombre brows heal beautifully, retain pigment, and deliver long-lasting, flawless results. Your brows will undergo several stages as they heal, and the first 10 days are crucial in ensuring the best results:
- Days 1-2: Immediately after your treatment, your brows will appear darker, more defined, and intense. You may notice some redness and slight swelling around the brow area; this is completely normal and will subside.
- Days 3-4: As the healing process begins, you’ll experience some redness and mild itchiness. Gently clean the area to remove any excess lymph fluid. It’s important to resist the urge to scratch as this can disrupt the healing skin, pull out pigment prematurely, and lead to patchy or uneven results.
- Days 5-7: This is the most challenging part of the healing process. Your brows will start to scab and flake, which may make them look patchy. While this can feel frustrating, it’s completely natural, and it’s important to let your skin heal at its own pace.
- Days 8-10: As the scabbing starts to fall off, you may notice that your brows appear lighter and possibly uneven.
- Days 11-28: This is the “safe zone” when the colour will slowly return, and your brows begin to settle into their final shade.
- Days 29-42: By the end of the 4-6 week healing period, your brows will be fully healed. If needed, this is the time to schedule a touch-up appointment for any adjustments or enhancements.
Do’s and Don’ts of Aftercare
To ensure your ombre brows heal properly and retain their beautiful pigment, follow these aftercare tips:
Do:
- Clean the area gently using a mild cleanser and water.
- Pat dry with a clean, soft cloth to avoid irritation.
- Use prescribed aftercare products exactly as recommended by your technician.
- Let the healing process take its course, avoid picking or scratching!
Don’t:
- Touch or scratch your healing brows, even if they itch.
- Pick at scabs or peeling skin; this can cause uneven healing.
- Apply makeup on or near the brow area during the healing phase.
- Expose your brows to excessive moisture, sweat, or sun. Avoid getting them too wet, especially in the first few days.
- Sleep on your face to prevent pressure on your brows and allow them to heal properly.
When To Schedule A Touch-Up
To keep your ombre brows looking their best, a little maintenance is key. While the initial results are long-lasting, touch-ups ensure your brows stay crisp, balanced, and true to your desired look.
- 6–8 Weeks After Initial Appointment: Your first touch-up should be scheduled 6 to 8 weeks after your initial treatment. This is an important follow-up that allows your artist to check how your brows have healed, even out any patchy areas, and make any needed adjustments to the shape or colour.
- Every 12–18 Months: To maintain the depth and definition of your ombre brows, most artists recommend touch-ups every 12 to 18 months. These sessions refresh the pigment, keep your brows from fading too much, and help you enjoy long-term results without a full redo.
Get the Ultimate Brow Upgrade
Ombre brows are a low-maintenance, high-impact way to enhance your natural beauty. With their ability to suit nearly every skin type, resist sweat and water, and stay looking fresh with minimal upkeep, it’s no wonder so many are making the switch!
At Noosa Brow Co, we’re redefining what great brows look and feel like. Whether you’re after a bold, structured shape or a soft, natural finish, we offer fully personalised ombre brow treatments tailored to you. Get in touch and let us help you achieve the brows you’ve always dreamed of, effortlessly flawless, every day.